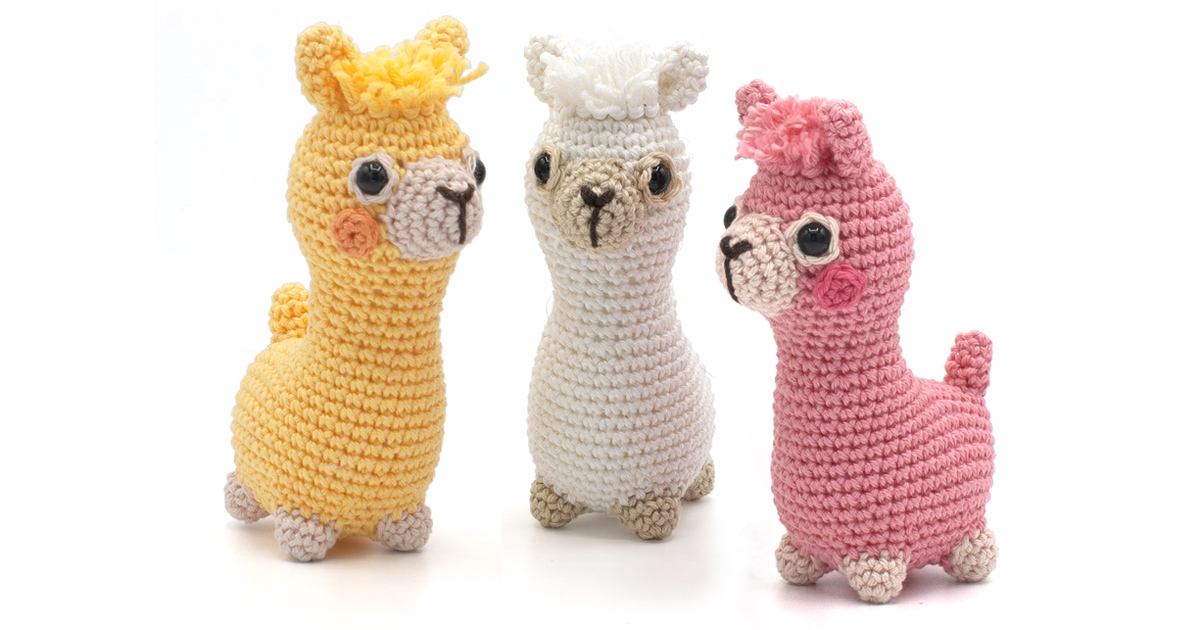
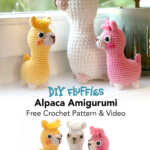
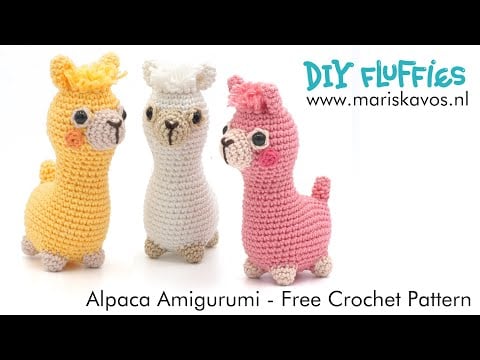

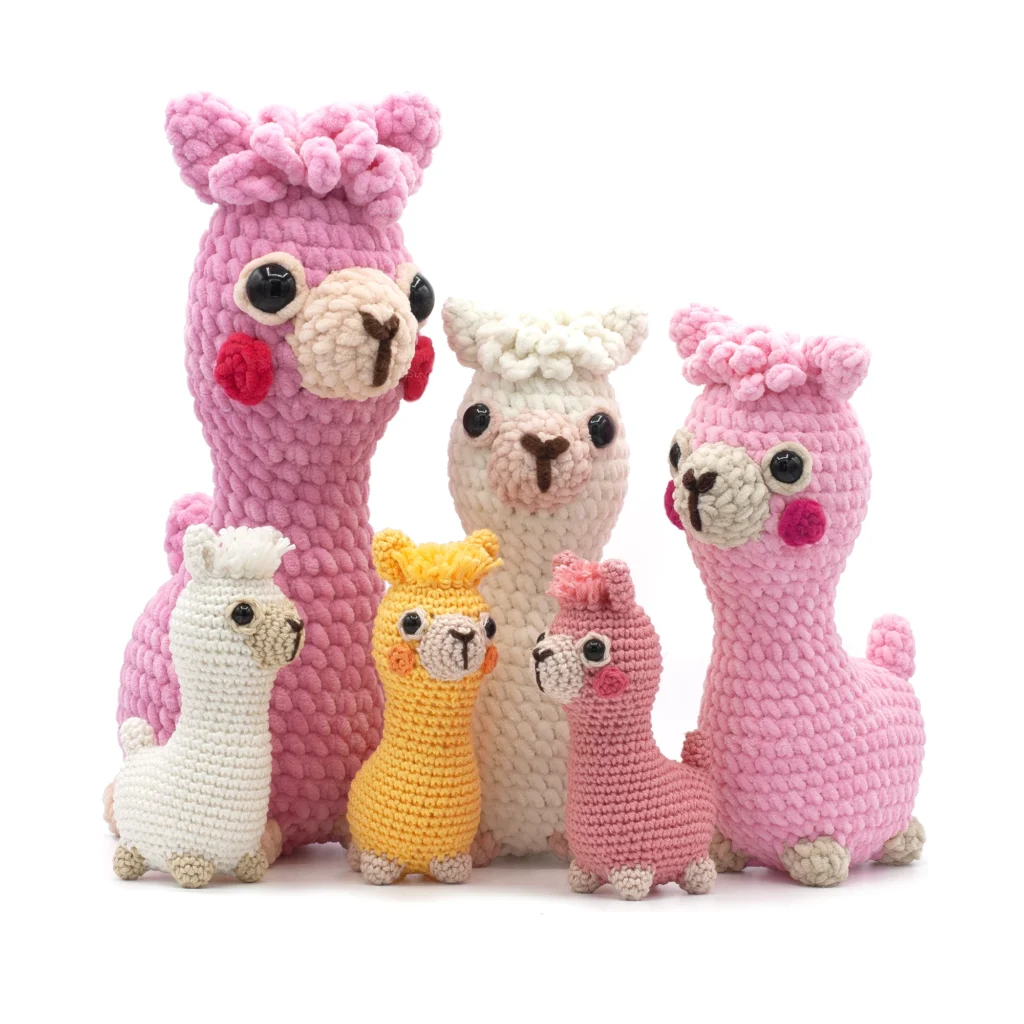
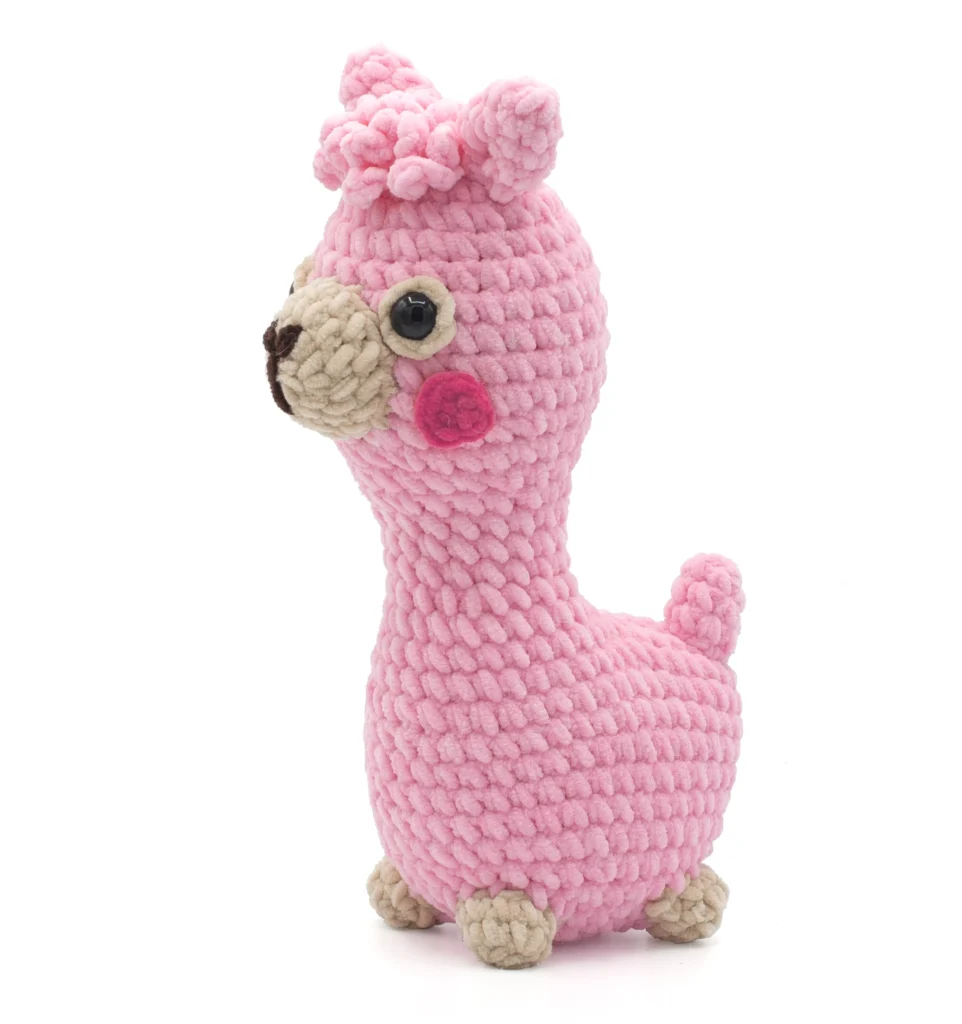
Cute Alpaca Amigurumi
Create your very own adorable Amigurumi with this free alpaca crochet pattern! Whether you’re a beginner or an experienced crocheter, this easy-to-follow pattern is perfect for everyone. In just a few hours, using any yarn of your choice, you can bring this charming alpaca Amigurumi to life.
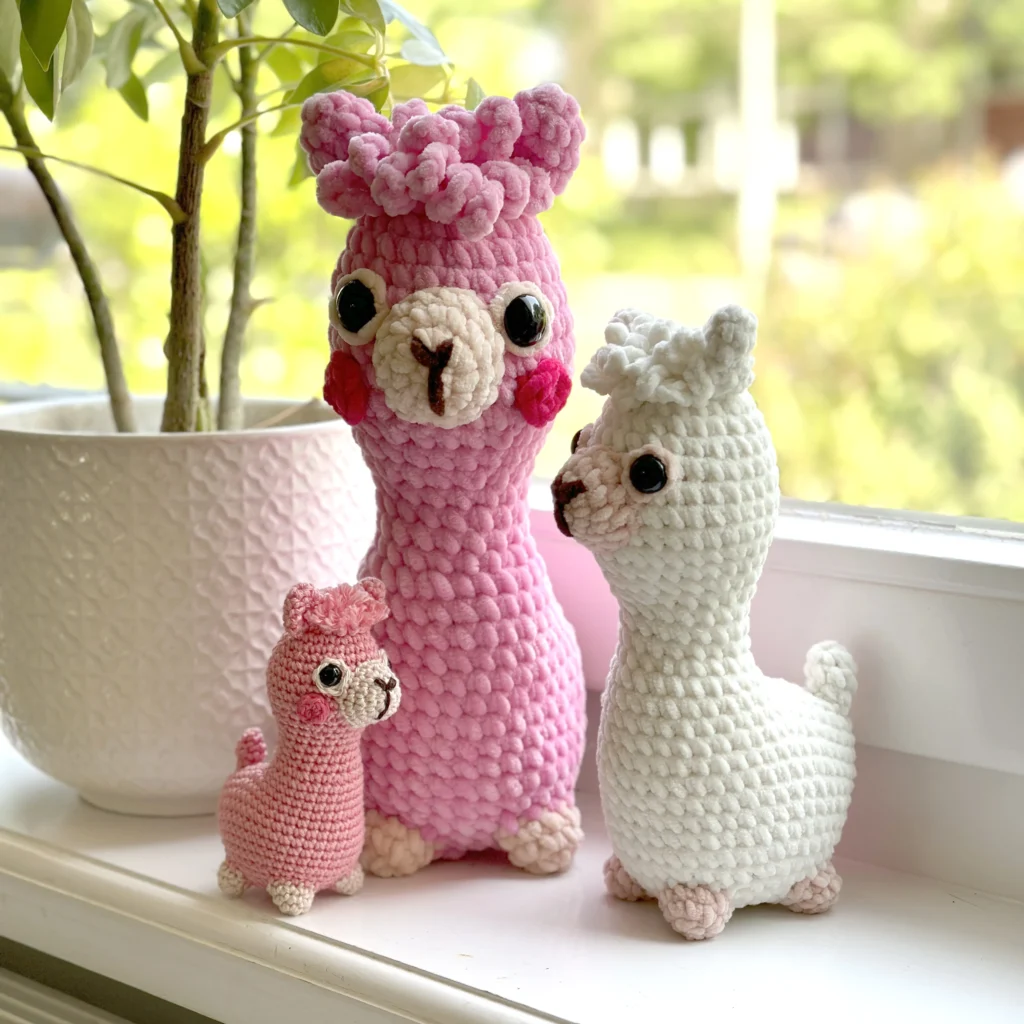
For the smaller alpaca, I used sport weight cotton yarn, for the larger version, I used chenille Super Bulky plush yarn.
To help you along the way, the pattern includes a comprehensive video tutorial that guides you through each step of creating this cute Amigurumi alpaca.
If you’re new to crocheting, don’t worry! Check out my beginner-friendly basic stitches tutorial, complete with numerous instructional videos. It covers everything you need to know to make your very own adorable Amigurumi.
Watch the full video on crocheting every step of this alpaca Amigurumi:
Materials:
These are the materials that I used for this alpaca You can replace them with other materials. If you wish to crochet a larger or smaller version of this mini alpaca Amigurumi you can just use a thicker or thinner yarn/crochet hook.
Cotton Sport Weight version 12 cm / 5 inch:
– Pink catania cotton color – 409
– Dark Pink catania cotton color – 256
– Beige catania cotton color – 436
– Brown catania cotton color – 162
– Synthetic Poly Filling
– 1 pair safety eyes 8 mm
Velvet Bulky version 22 cm / 9inch:
– Pink durable velvet yarn
– Dark pink durable velvet yarn
– Beige durable velvet yarn
– Black durable velvet yarn
– Synthetic Poly Filling
– 1 pair safety eyes 13 mm
Chenille Super Bulky plush version 30 cm / 12 inch:
– Pink Chenille yarn
– Dark Pink Chenille yarn
– Beige Chenille yarn
– Brown Chenille yarn
– Synthetic Poly Filling
– 1 pair safety eyes 18 mm
TIP Chenille/Velvet or other similar yarn: The body of the alpaca might look a bit to oval when crocheting it, don’t worry about it, it will be fine when you put stuffing in it.
Check the materials page on my website if you need help in choosing the right materials for this free alpaca crochet pattern.
Supplies:
– Scissors
– Tapestry needles with blunt point, nr. 16 or 17
– Pins
– Crochet hook size 2.5 mm 4/0 for the cotton, 3.5 mm for velvet yarn or 5.0 mm H for Chenille yarn
Legs 4x:
- Use beige yarn
- Rnd 1: start 6 sc in a magic ring (6)
- Rnd 2: (sc in next 2 st, inc in next st) repeat 2 times (8)
- Rnd 3: sc in all 8 st (8)
- Fasten off with a slst
Circle around Eye 2x:
- Use dark pink yarn
- Rnd 1: start 6 sc in a magic ring (6)
Leave an opening in the middle for the safety eyes. - Fasten off cleanly, leaving a long tail for sewing.
- Place the safety eyes in the middle of the circles. Do not place the washers on the safety eyes yet.
Body:
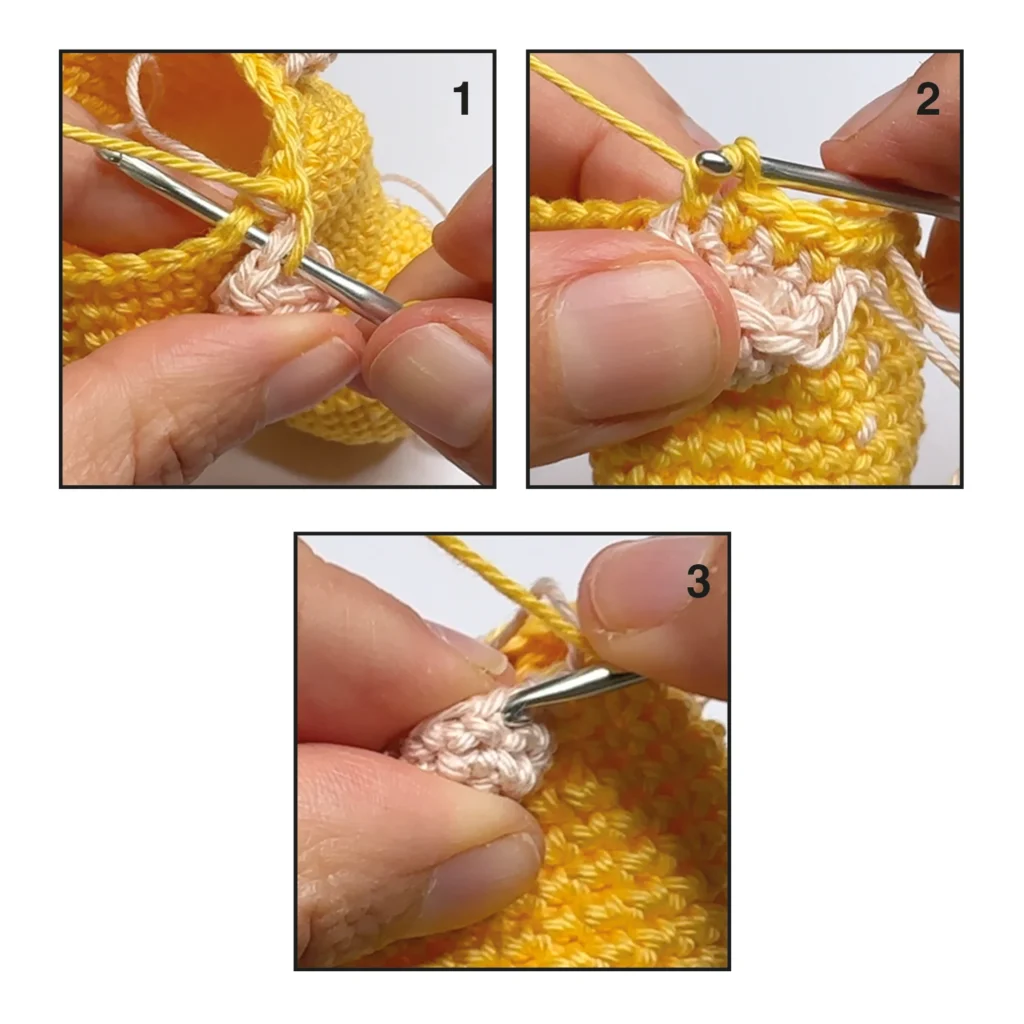
- Rnd 32: (sc in next 2 st of the body, sc in the remaining 3 st of the leg (photo 3), sc in next 4 st of the body, sc in the remaining 3 st of the leg) repeat 2 times (24)
- Rnd 33: (sc in next 2 st, dec) repeat 6 times (18)
- Rnd 34: (sc, dec in next st) repeat 6 times (12)
- Stuff the body with filling.
- Rnd 35: dec 6 times (6)
- Finish the body by taking the last strand of yarn and sewing it through the front loops of every crochet stitch that you made in the last round. Pull the yarn tight to close the hole. Now stick a needle under the hole and weave in the yarn end.
Tail:
- Use pink yarn
- Rnd 1: start 4 sc in a magic ring (4)
- Rnd 2: (sc, inc in next st) repeat 2 times (6)
- Rnd 3-4: sc in all 6 st (6)
- Slst in next st. Fasten off, leaving a long tail for sewing.
- Sew the tail on the back of the body over round 20.
Ear 2x:
- Use pink yarn
- Rnd 1: start 6 sc in a magic ring (6)
- Rnd 2: sc in all 6 st (6)
- Rnd 3: (sc in next st, inc in next st) repeat 3 times (9)
- Rnd 4-5: sc in all 9 st (9)
- Slst in next st. Fasten off, leaving a long tail for sewing.
- Sew the ears on top of the head between rounds 2 and 5.
Snout:
- Use beige yarn
- Rnd 1: start 6 sc in a magic ring (6)
- Rnd 2: inc 6 times (12)
- Rnd 3: (sc in next 3 st, inc in next st) repeat 3 times (15)
- Rnd 4: sc in all 15 st (15)
- Slst in next st. Fasten off, leaving a long tail for sewing.
- With brown yarn embroider the nose and mouth on the snout of the Alpaca Amigurumi. The nose over round 2, the nose is 2 stitches wide. The mouth is 3 rounds long. Sew the snout between rounds 6 and 12.
Cheek 2x:
- In dark pink yarn
- Rnd 1: start 6 sc in a magic ring (6)
- Fasten off, leaving a long tail for sewing.
Sew the cheeks between rounds 9 and 12, about one st from the snout.
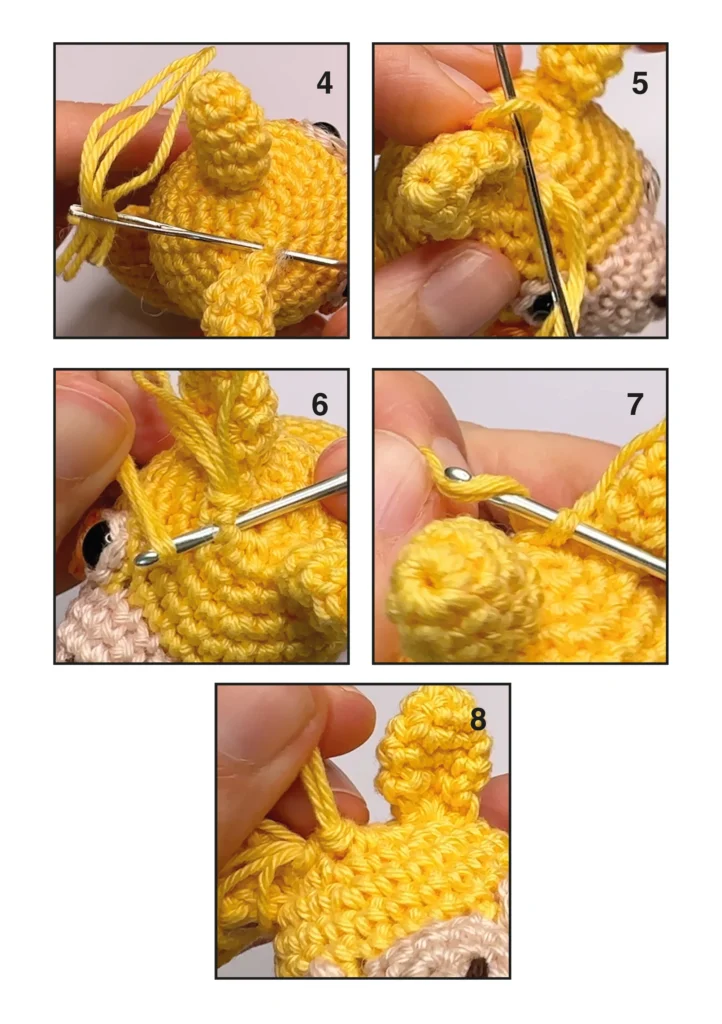
Now we are going to make some hair on rounds 1, 2 and 3 of the the head of the Alpaca. Only on the front of the head. If you are using cotton or other sturdy yarn, you can make the hairs like this:
Cut 22 strands of 4 in / 9 cm of pink yarn.
Take 2 strands and fold them. Thread the folded strands onto an embroidery needle and attach them over round 3 (photo 4-5). Instead of using an embroidery needle you can use your crochet hook to pull the hair through the head (photo 6-8).
You can also watch the video above to see how to make the hair.
Sew 5 double strands over round 3. 4 double strands over round 2 and 2 double strands over round 1.
Cut the yarn to the desired length.
If you are using chenille or other fabric yarn that comes apart when cutting it, create the hair with chain stitches.
CH 6 and now attach the chain to the head with a slst, ch 6 again and attach the hair to the head again with a slst. Do this many times to create the hair. I made a video on how to do this.
Now your Alpaca Amigurumi is done! hope enjoyed this free alpaca crochet pattern, I have many more free amigurumi patterns available on this website.
Source link