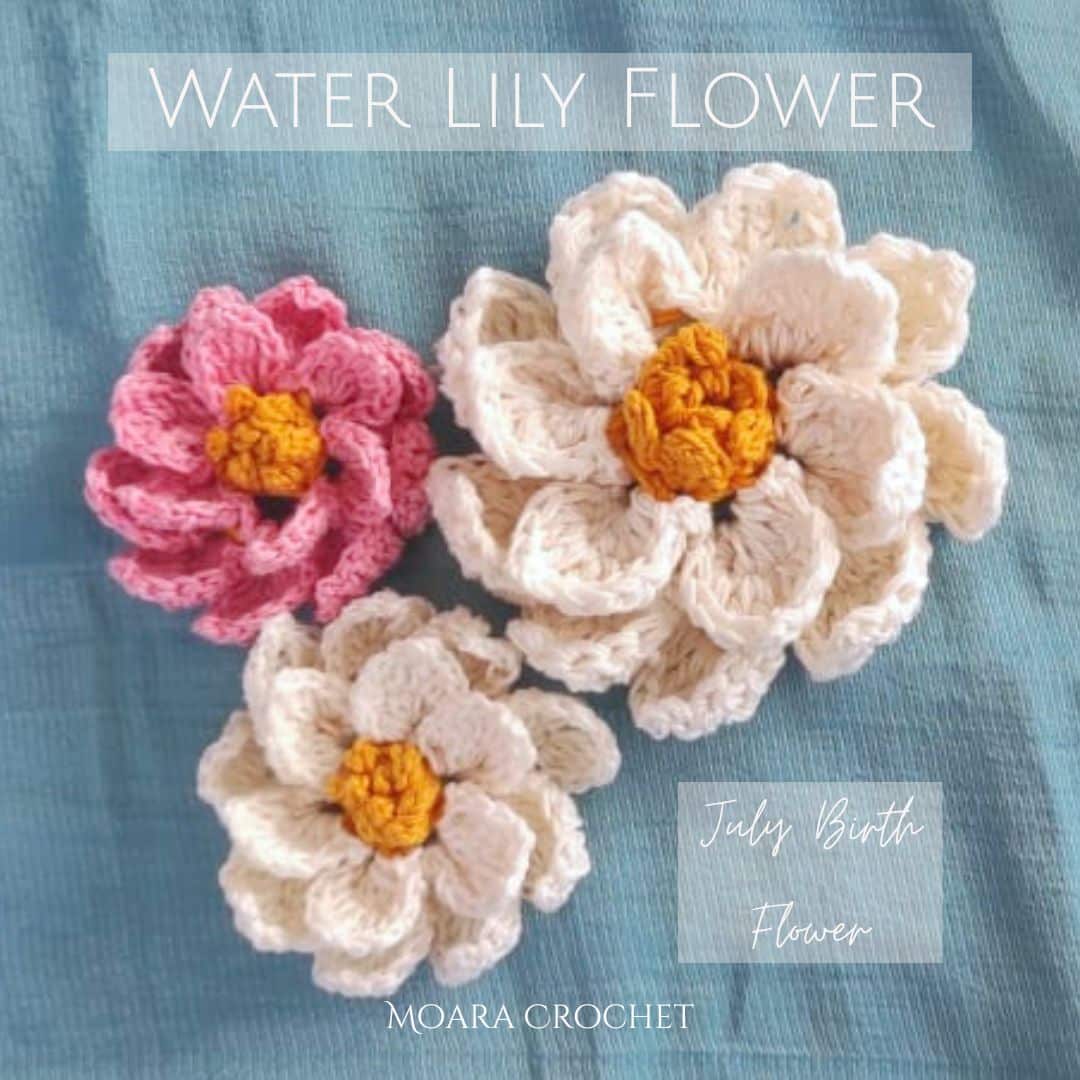
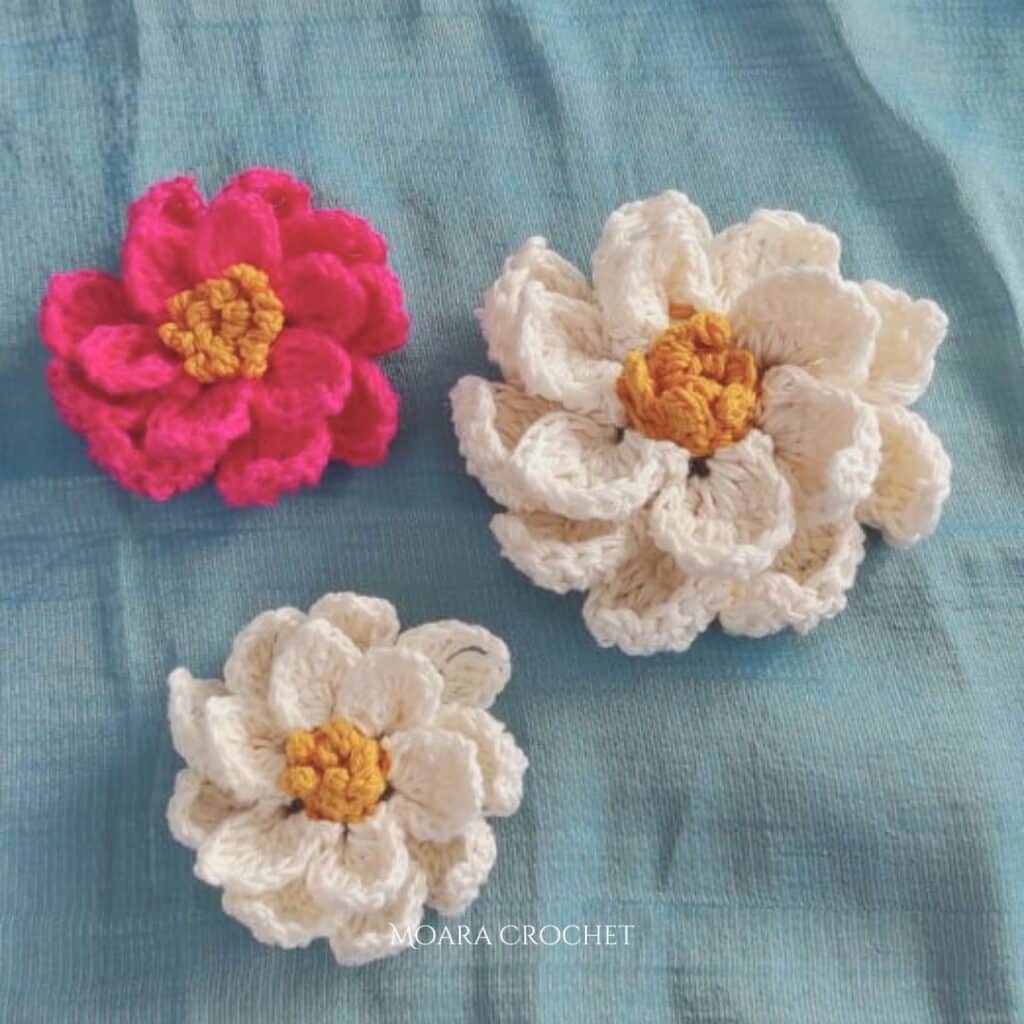
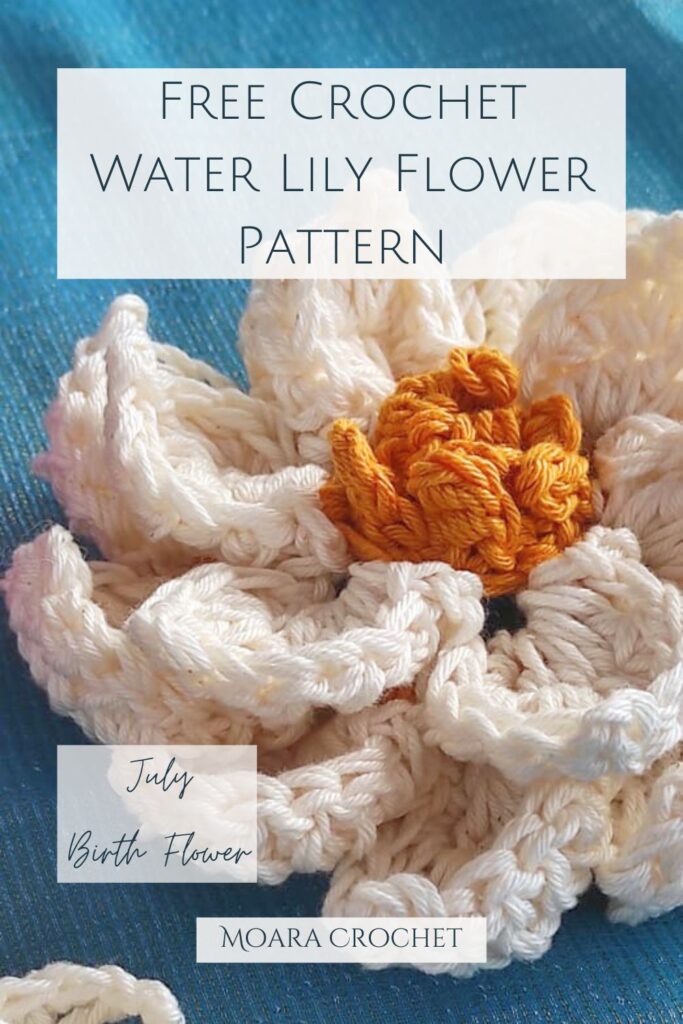
Today I am sharing with you my Crochet Water Lily Flower Pattern to celebrate all of those born during July. The Larkspur flower symbolizes purity, calmness, and spiritual connection. These gorgeous flowers bloom from a single stem which is filled with layers of petals. A flower that floats above the water found in a range of whites, creams, blush pinks to vibrant fushia.
The second birth flower for July is the Larkspur flower. This bursting petaled flower symbolize positivity, love and youth. If you would like to make my Crochet Larkspur Birth Flower click HERE.
This is a more advanced crochet flower pattern to create which you can make with any yarn and matching sized crochet hook (although you do want to keep your stitches tight, so use the smallest crochet hook you can for your sized yarn). Depending on the size of yarn you use will increase or decrease your sized flower, but I can promise they will all be beautiful.
My free pattern includes the step by step tutorial to crochet the flower. If you would like to support me to continue creating FREE PATTERNS, you can purchase the Lily Flower and Pad Crochet Granny Square PDF pattern in my Webshop or in my Etsy for only $2.99.
My free Crochet Water Lily pattern is written below with a simple step by step written | photo tutorial. Or if you prefer a video tutorial, I have also made a Youtube video.
Materials (Per Flower)
8 meters Yellow DK Yarn
30 meters White DK Yarn (You can use any colour you wish for your flower)
Matching crochet hook for your yarn I have used 2.5mm | US B Crochet Hook
Scissors
Tapestry Needle
Gauge: N/A Use the smallest crochet hook you can with your chosen yarn to create tight stitches, this will help your flower keep the form.
Size: My crochet Flower is 8cm diameter.
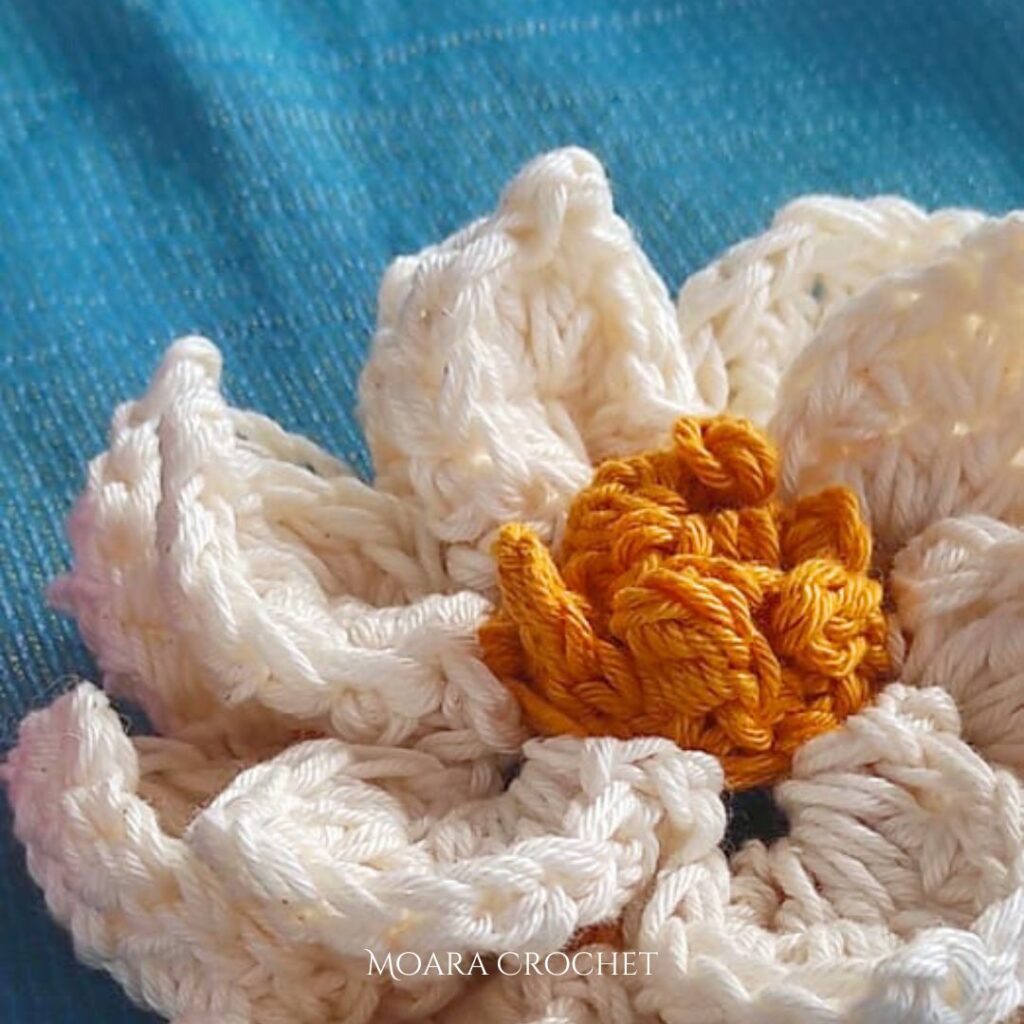
Notes: The flower is worked in the round, working into the dc posts, and ch3 bars to create a 3D effect. The petals are crocheted in a 3D manner. The Flower is made as one motif.
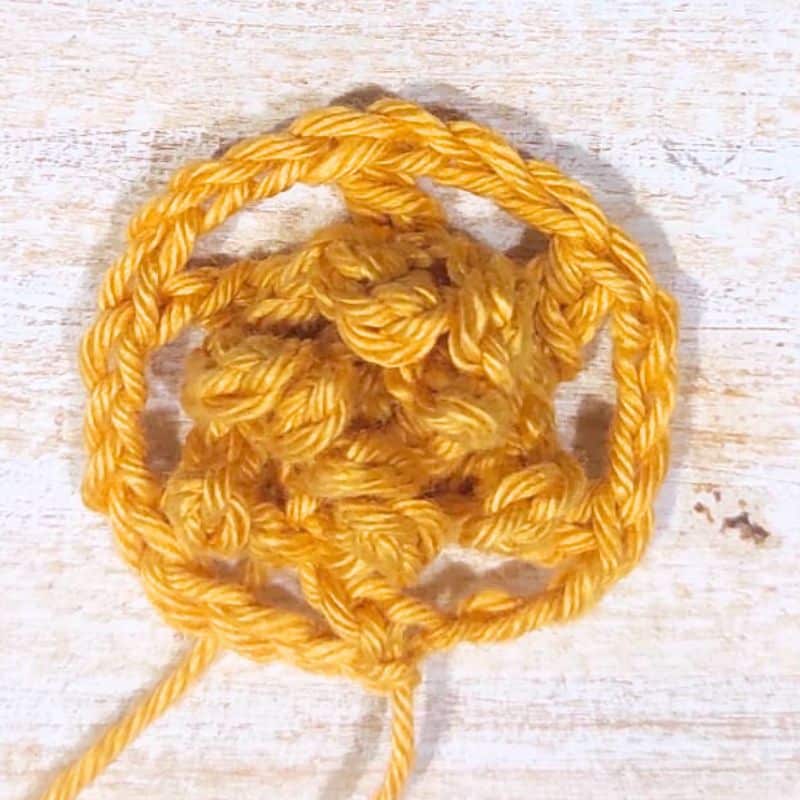
Row 1 Yellow Yarn: Make a magic circle, ch1 (count as heightening chain), add 6sc into the center of the magic circle, continue in the round. Total: 6sc.
Row 2: *sl st into the FRONT LOOP, ch3, sl st into the 2nd from the hook, sl st, sl st into the FRONT LOOP of the next stitch* repeat * to * 2 more times.
Row 3: WORKING IN THE BACK LOOPS OF ROW 1, 6sc inc. Total: 12sc. Photo shows the motif from the BACK.
Row 4: *sl st into the FRONT LOOP of ROW 3, ch3, sl st into the 2nd from the hook, sl st, sl st into the FRONT LOOP of the next stitch* repeat * to * 5 more times.
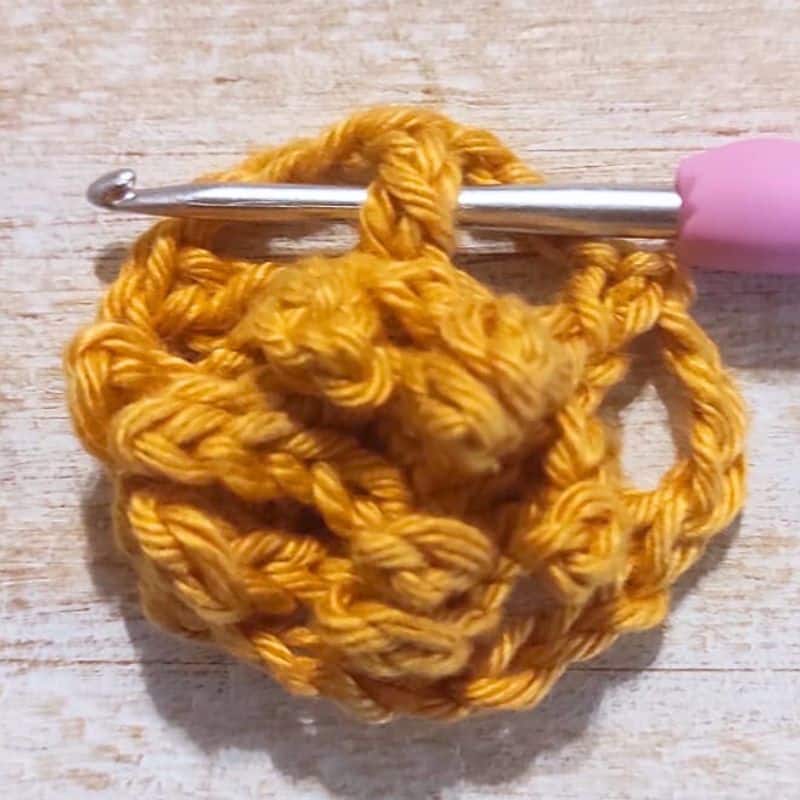
Row 5: WORKING IN THE BACK LOOPS OF ROW 3. Chain 6 (count as dc, ch3), skip stitch, * dc, ch3, skip stitch* repeat * to* 4 more times. Sl st into the third chain at the beginning if the Row. Fasten off and weave in your ends.
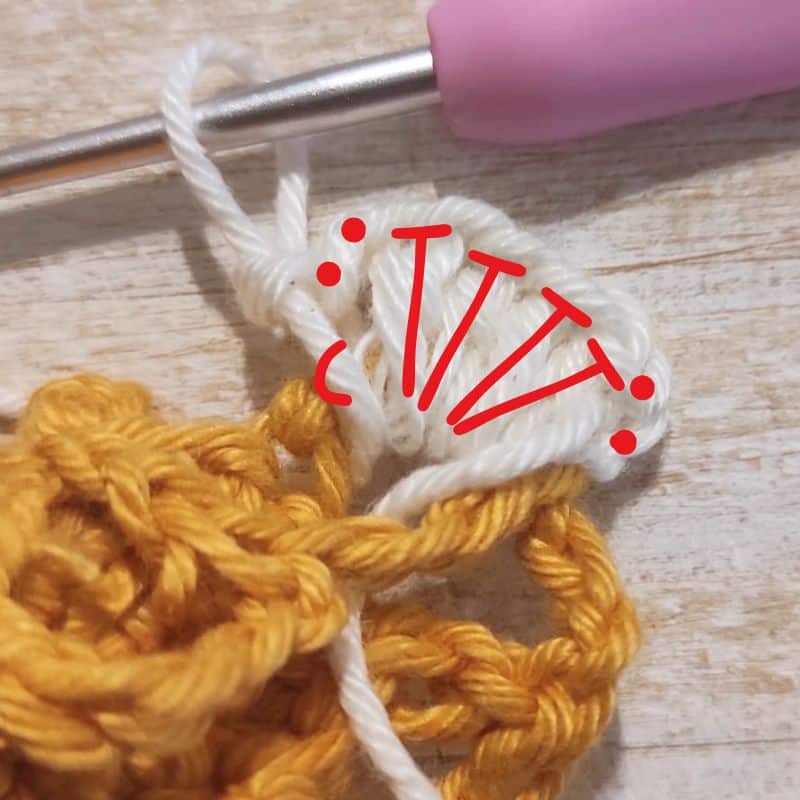
Row 6 (Colour 2 White): Attach yarn to any dc post from Row 5, as shown in the photo. *(sl st under the dc post, ch2, 4hdc, ch2, sl st under the dc post – as shown in the second photo),
ch3, sl st under the ch3 Row 5 , as shown in the photo below * repeat * to * 5 more times.
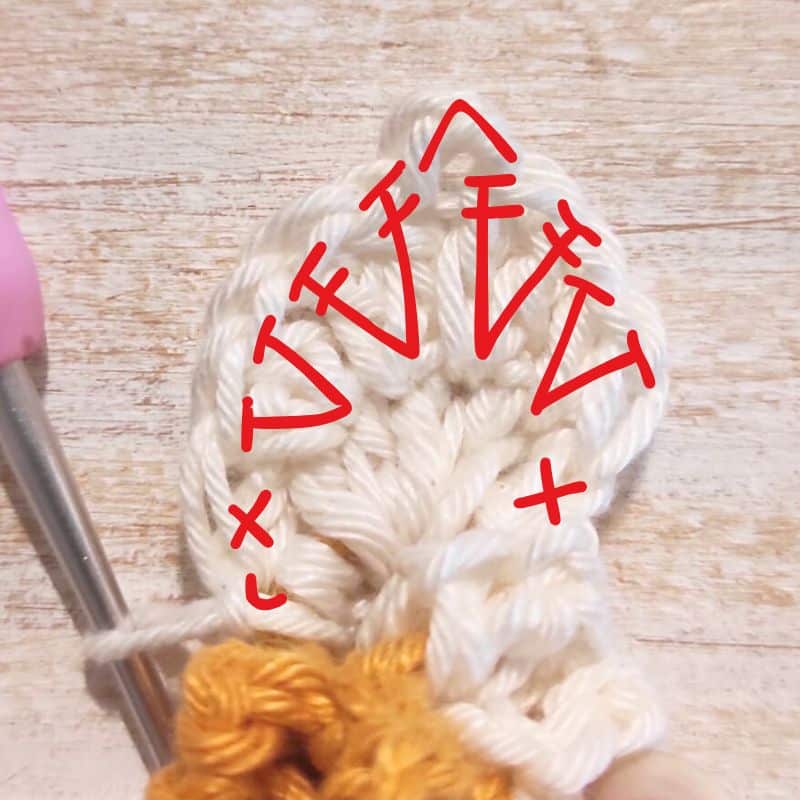
Row 7: *Sc in the chain 2, hdc inc., dc inc., picot – chain 2, sl st into the 2nd chain from the hook, dc inc., hdc inc., sc in the ch2, sl st under dc post of Row 5
ch3, sl st under the ch3 of Row 5, as shown in the photo below * repeat * to * 5 more times, sl st in to the first sc.
Fasten off and weave in your ends.
Row 8 Yellow Yarn: Attach the yarn to any dc from Row 5, this will be difficult to see as you have a lot of crochet stitches from Row 6, chain 6 (count as dc, ch3), dc into the ch3 of Row 5, chain 3 (as shown in the photo below),
dc into the next dc of Row 5, chain 3, *dc, ch3 into next dc, dc into the ch3, ch3, dc in the next dc, ch3* repeat * to * 1 more time, sl st into the first dc. Now you will have 9dc stitches as shown in the photo above which shows the flower from the back. Fasten off & weave in your ends.
Row 9 (Colour 2 White): Attach yarn to any dc post from Row 8, as shown in the first photo. *(sl st under the dc post, ch2, 4dc, ch2, sl st under the dc post – as shown in the photo below),
ch3, sl st under the ch 3 Row 8 , as shown in the photo below * repeat * to * 5 more times.
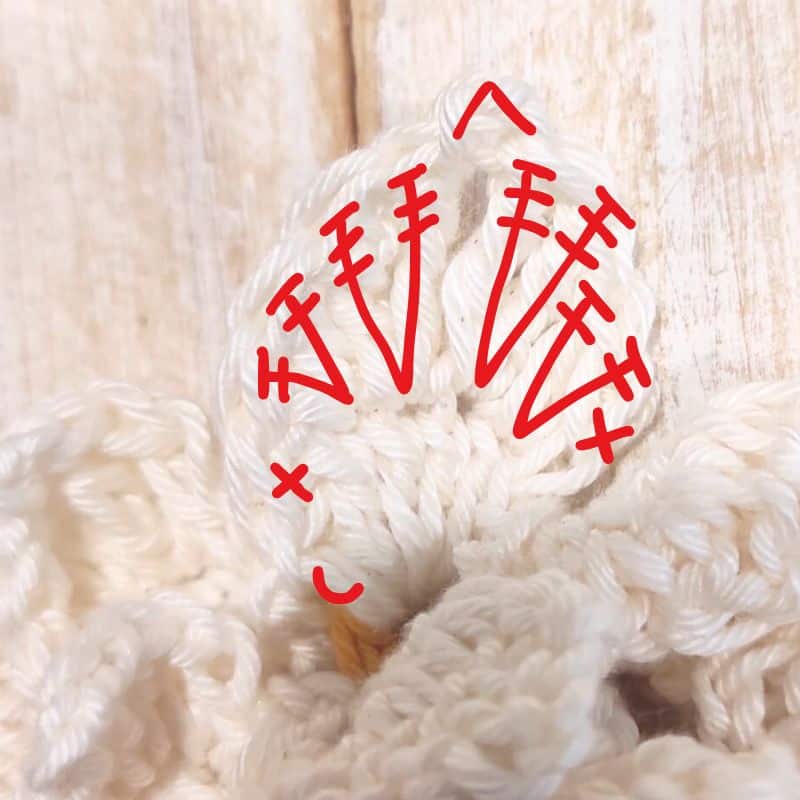
Row 10: *Sc in the chain 2, dc inc., tr inc., picot – chain 2, sl st into the 2nd chain from the hook, tr inc., dc inc., sc, in the ch2, sl st under dc post of Row 8, ch3, sl st under the ch3 of Row 8, as shown in the photo below * repeat * to * 5 more times, sl st in to the first sc.
Fasten off and weave in your ends.
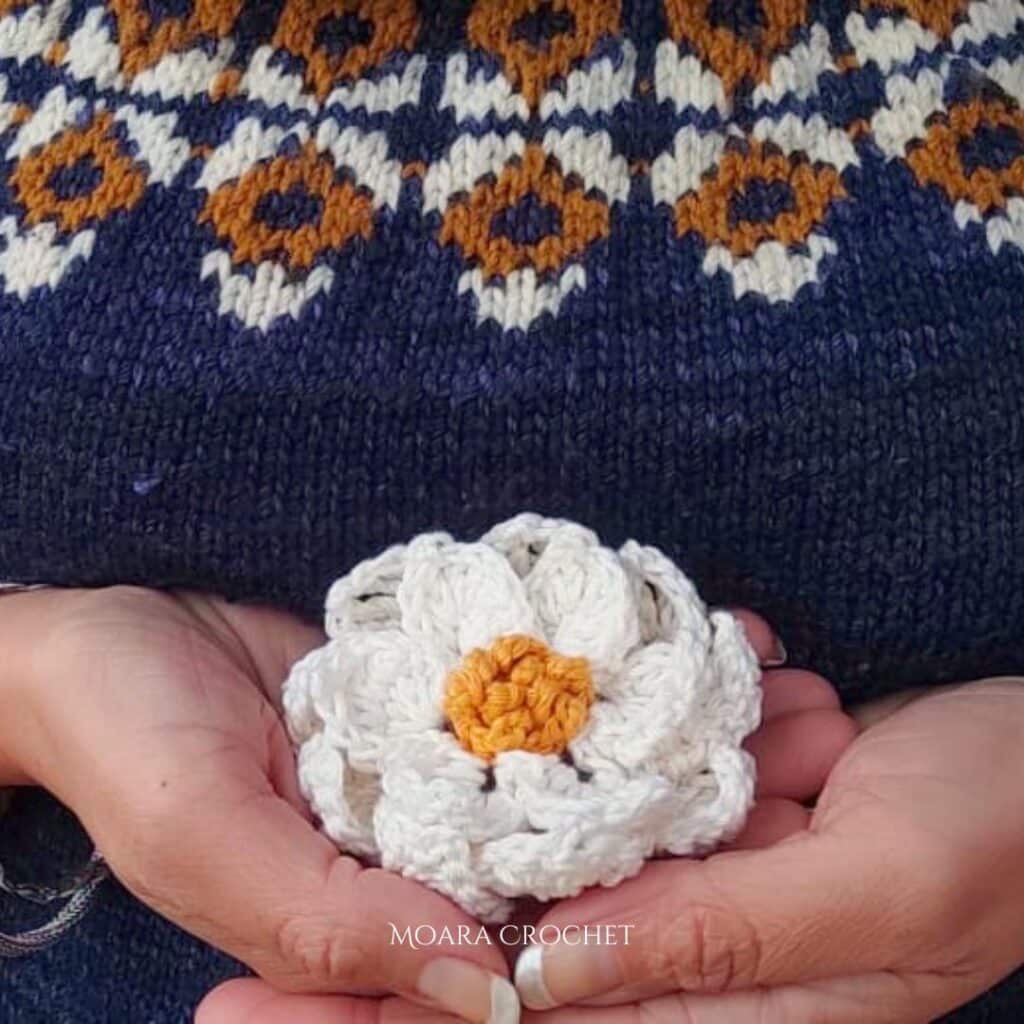
Congratulations you have made your Crochet Water Lily Flower. I would love to see you crochet creations, please tag me on @moara_crochet on Instagram to share your work.
WANT TO MAKE MY FREE CROCHET WATER LILY FLOWER PATTERN?
PIN IT TO YOUR CROCHET OR CRAFT BOARD TO SAVE FOR LATER!