n

n
n
n
n
n
n
n
n
n
n
Now, obviously, I don’t have the rights to the Octonauts characters/designs. After digging through the swamp of confusing copyright laws, I’m pretty sure that it’s fine to make a GUP for personal use, but it’s not cool to sell one. So I’m offering this pattern for free to you all (and won’t be selling a PDF for it). While I’m normally fine with you selling things made from my patterns, please remember that this pattern is intended for personal use only.
n
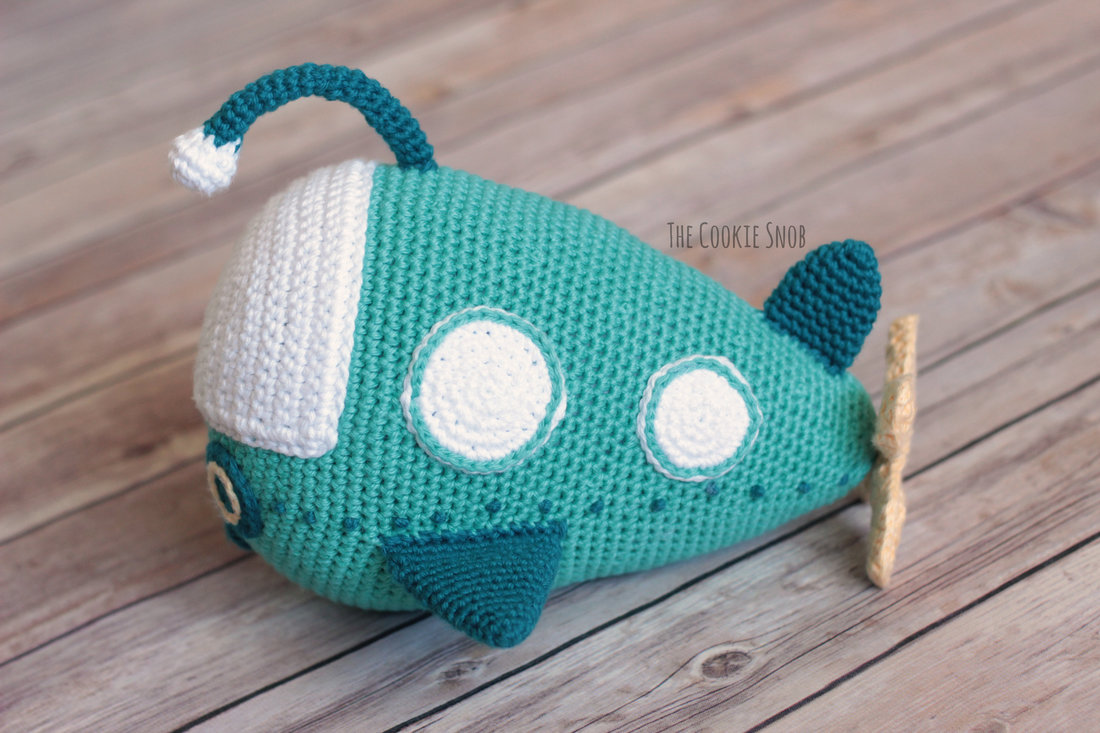
Alright, now that we’re done with formalities, let’s get to the pattern!
n
n

n
n
n
n
Materials:
n
- n
- 1 skein of I Love This Cotton! Yarn in Aspyn
- Less than 1 skein of I Love This Cotton! Yarn in White
- Less than 1 skein of I Love This Cotton! Yarn in Deep Teal
- Less than 1 skein of I Love This Cotton! Yarn in Banana
- Size E (3.5mm) crochet hook
- Size C (2.75mm) crochet hook
- Fiberfill stuffing
- Tapestry needle
- Optional: one 9mm safety eye
- Optional: Stitch marker
n
n
n
n
n
n
n
n
n
n
n
Stitch Glossary:
nst(s) = stitch(es)
nch = chain
nss = slip stitch
nsc = single crochet
ninc = sc increase (work 2 sc in the same st)
ndec = sc decrease (I prefer to use the invisible decrease stitch for most sections of the pattern)
n
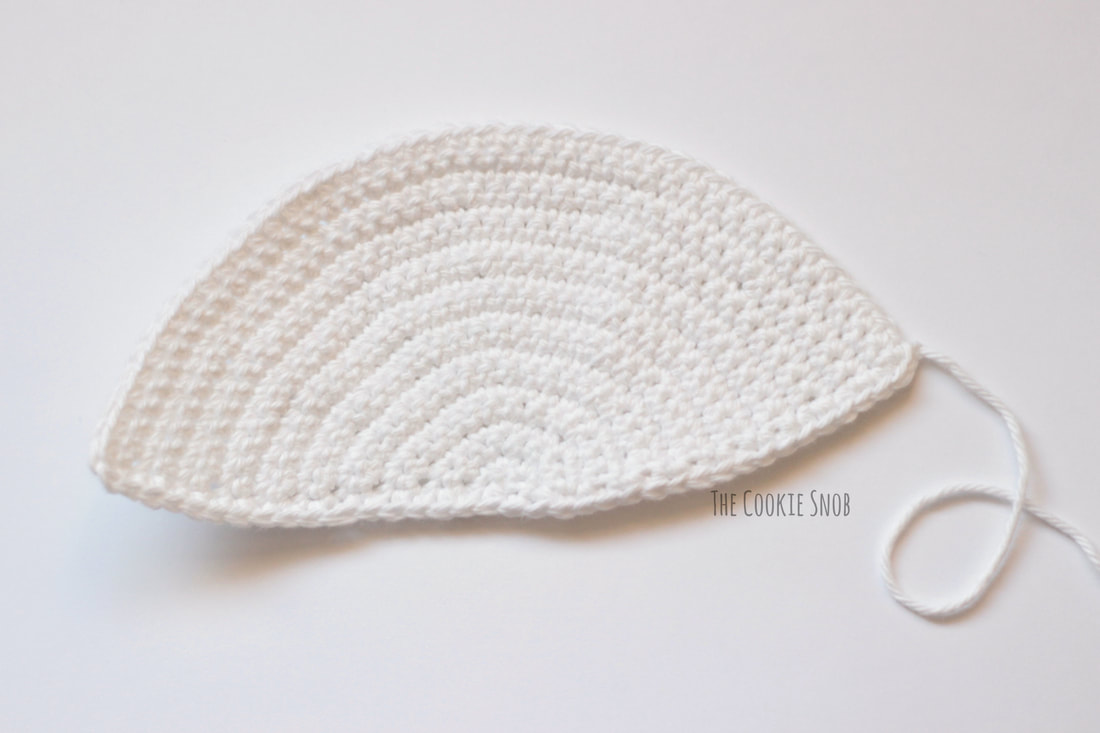
Windshield:
nUsing the White yarn and the E hook:
nRow 1: Make a magic circle and work 3 sc into the circle, pull taut to close and turn (3)
nRow 2: ch 1, inc 3 times, turn (6)
nRow 3: ch 1, [inc, sc] 3 times, turn (9)
nRow 4: ch 1, [sc, inc, sc] 3 times, turn (12)
nRow 5: ch 1, [inc, sc in the next 3 sts] 3 times, turn (15)
nRow 6: ch 1, [sc in the next 2 sts, inc, sc in the next 2 sts] 3 times, turn (18)
nRow 7: ch 1, [inc, sc in the next 5 sts] 3 times, turn (21)
nRow 8: ch 1, [sc in the next 3 sts, inc, sc in the next 3 sts] 3 times, turn (24)
nRow 9: ch 1, [inc, sc in the next 7 sts] 3 times, turn (27)
nRow 10: ch 1, [sc in the next 4 sts, inc, sc in the next 4 sts] 3 times, turn (30)
nRow 11: ch 1, [inc, sc in the next 9 sts] 3 times, turn (33)
nRow 12: ch 1, sc around, turn (33)
nRow 13: ch 1, [sc in the next 5 sts, inc, sc in the next 5 sts] 3 times, turn (36)
nRow 14: ch 1, sc around, turn (36)
nRow 15: ch 1, [inc, sc in the next 11 sts] 3 times, turn (39)
nRow 16: ch 1, sc around, turn (39)
nRow 17: ch 1, [sc in the next 6 sts, inc, sc in the next 6 sts] 3 times, turn (42)
nRow 18: ch 1, sc around, turn (42)
nRow 19: ch 1, [inc, sc in the next 13 sts] 3 times, turn (45)
nRow 20: ch 1, sc around (45)
nFasten off, leaving an extra long yarn tail for sewing
n
n
n
n
n
n
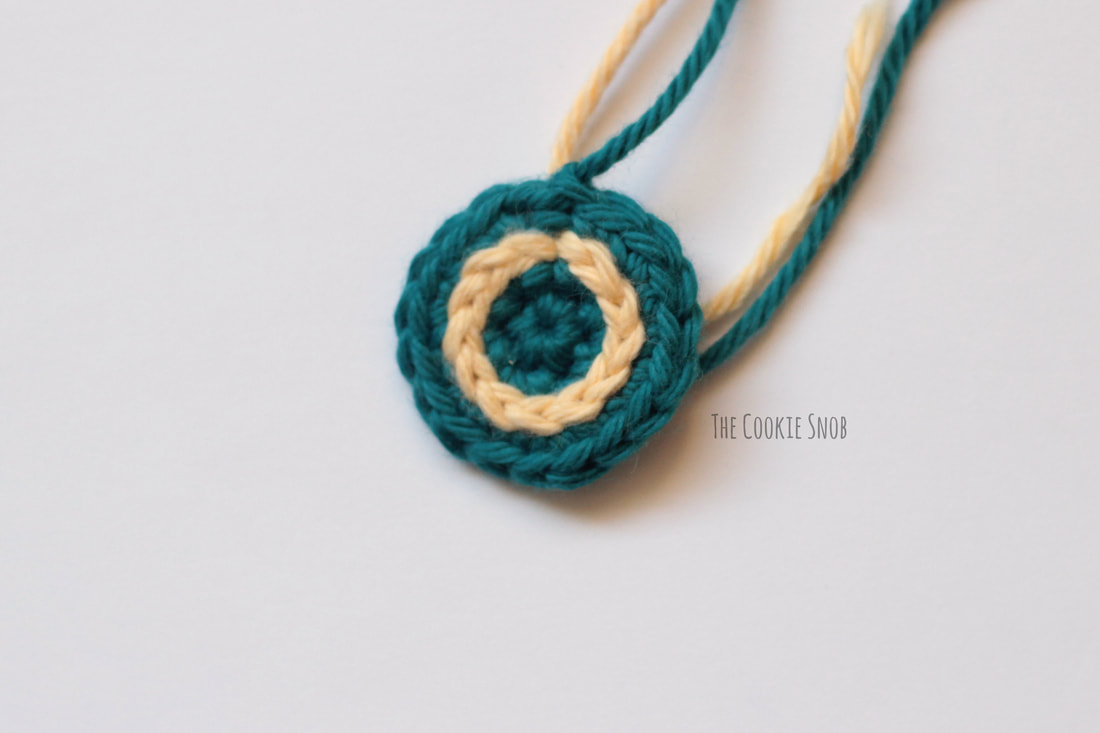
nStarting with the Deep Teal yarn and the E hook:
nRound 1: Make a magic circle and work 6 sc into the circle, ss to the first sc to join (6)
nRound 2: ch 1, inc around, ss to join (12)
nRound 3: ch 1, [inc, sc] 6 times, ss to join (18)
nFasten off, leaving a long yarn tail for sewing
nUsing the Banana yarn, surface crochet a circle in the space between rounds 2 and 3.
n
n
n
n
n
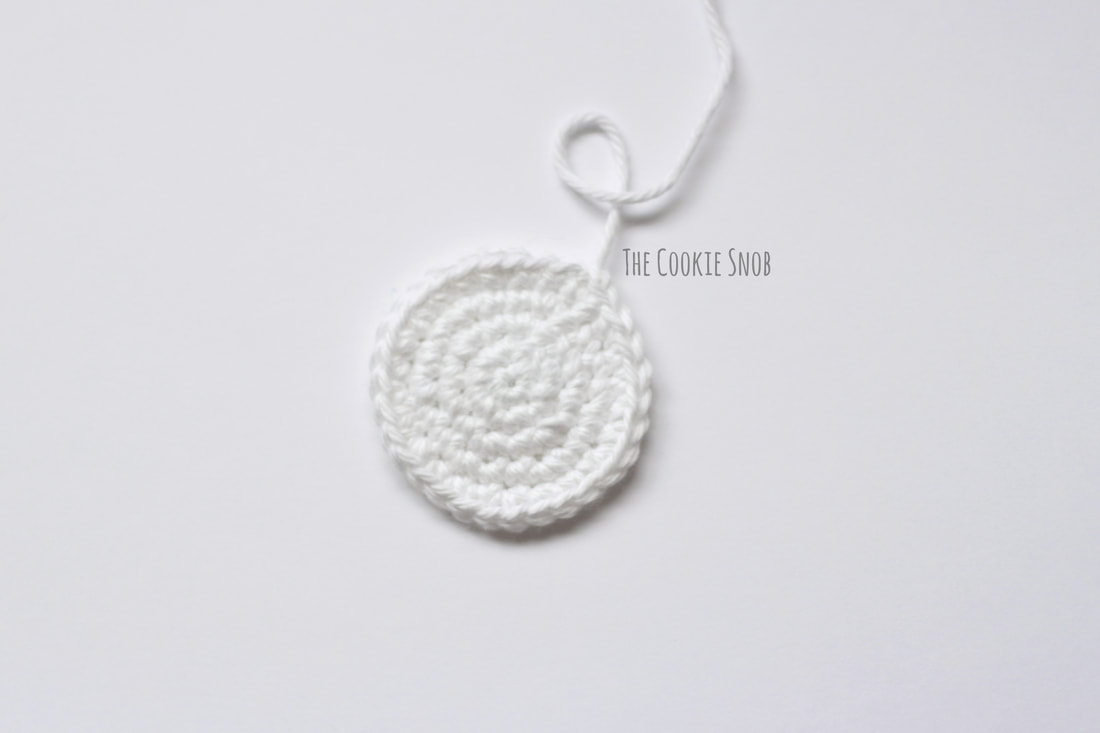
nUsing the White yarn and the E hook:
nRound 1: Make a magic circle and work 6 sc into the circle, ss to the first sc to join (6)
nRound 2: ch 1, inc around, ss to join (12)
nRound 3: ch 1, [inc, sc] 6 times, ss to join (18)
nRound 4: ch 1, [sc, inc, sc] 6 times, ss to join (24)
nRound 5: ch 1, [inc, sc in the next 3 sts] 6 times, ss to join (30)
nFasten off.Back Porthole (make 2):
nUsing the White yarn and the E hook:
nRound 1: Make a magic circle and work 6 sc into the circle, ss to the first sc to join (6)
nRound 2: ch 1, inc around, ss to join (12)
nRound 3: ch 1, [inc, sc] 6 times, ss to join (18)
nRound 4: ch 1, [sc, inc, sc] 6 times, ss to join (24)
nFasten off.
n
n
n
n
n
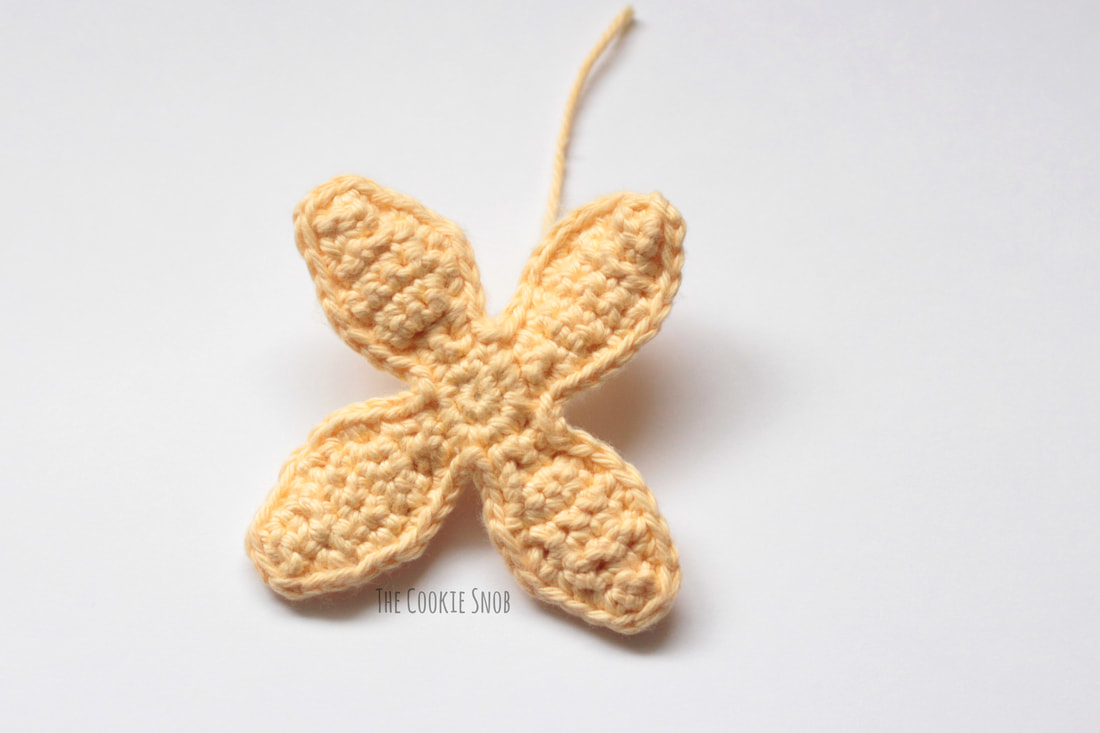
nUsing the Banana yarn and the E hook:
nRow 1: Make a magic circle and work 8 sc into the circle, ss to the first sc to join (8)
nRows 2-4: ch 1, sc in the next 2 sts, turn (2)
nRow 5: ch 1, inc twice, turn (4)
nRows 6-8: ch 1, sc in the next 4 sts, turn (4)
nRow 9: ch 1, dec twice, turn (2)
nRow 10: ch 1, sc in the next 2 sts, turn (2)
nRow 11: ch 1, dec (1)
nFasten off. [Rejoin the yarn in the next sc from Row 1 and repeat Rows 2-11] 3 times.
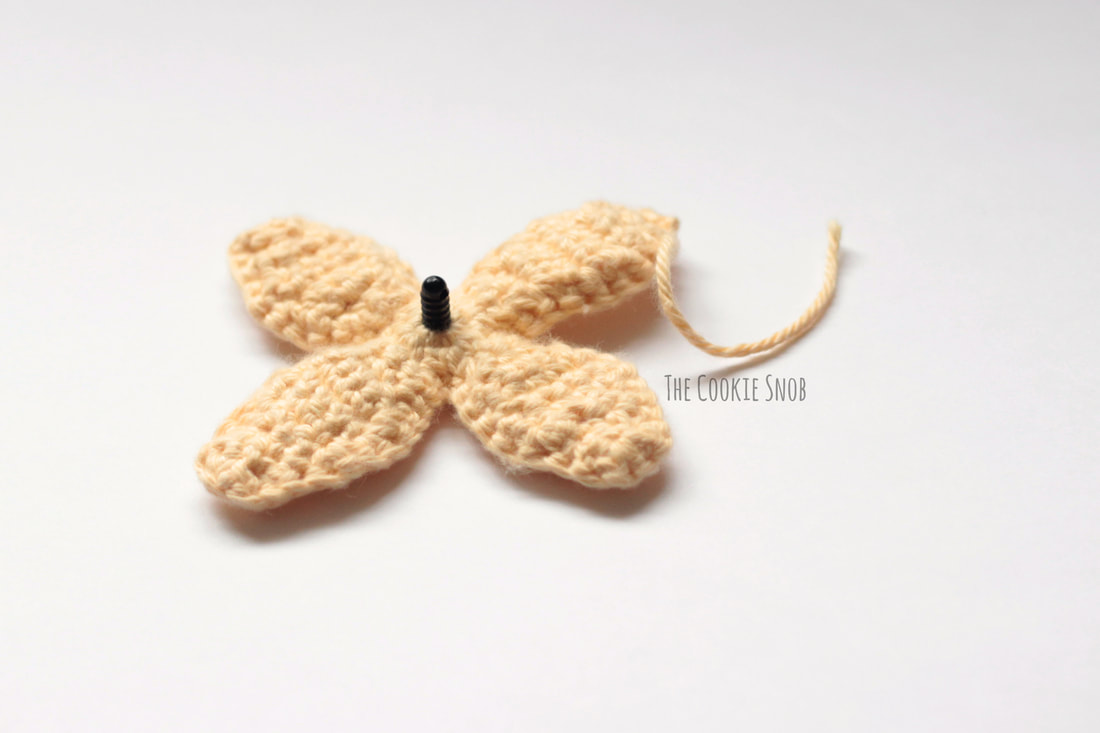
nAfter making the second propellor, hold the two propellor pieces together and sc through both pieces to create a clean edge while also attaching the pieces together. See below for an optional step in the joining process to allow the propellor to spin, or just skip the step with the safety eye for a fixed propellor.
n
n
n
n
n
n
n
n
n
n
Note: The rest of the pattern is worked in a continuous round, (meaning the stitches are worked in a continuous spiral without turning or joining). I recommend using a stitch marker and moving it after every round to help you keep track of which round you’re working on.
n
Side Fin (make 2):
nUsing the Deep Teal yarn and the E hook:
nRound 1: Make a magic circle and work 6 sc into the circle (6)
nRound 2: sc around (6)
nRound 3: [inc, sc] 3 times (9)
nRound 4: sc around (9)
nRound 5: [inc, sc in the next 2 sts] 3 times (12)
nRound 6: sc around (12)
nRound 7: [inc, sc in the next 3 sts] 3 times (15)
nRound 8: sc around (15)
nRound 9: [inc, sc in the next 4 sts] 3 times (18)
nRound 10: sc around (18)
nRound 11: [inc, sc in the next 5 sts] 3 times (21)
nRound 12: sc around (21)
nRound 13: [inc, sc in the next 6 sts] 3 times (24)
nRound 14: sc around (24)
nSs to the next st to even off the round and fasten off, leaving a long yarn tail for sewing
n
n

n
n
n
n
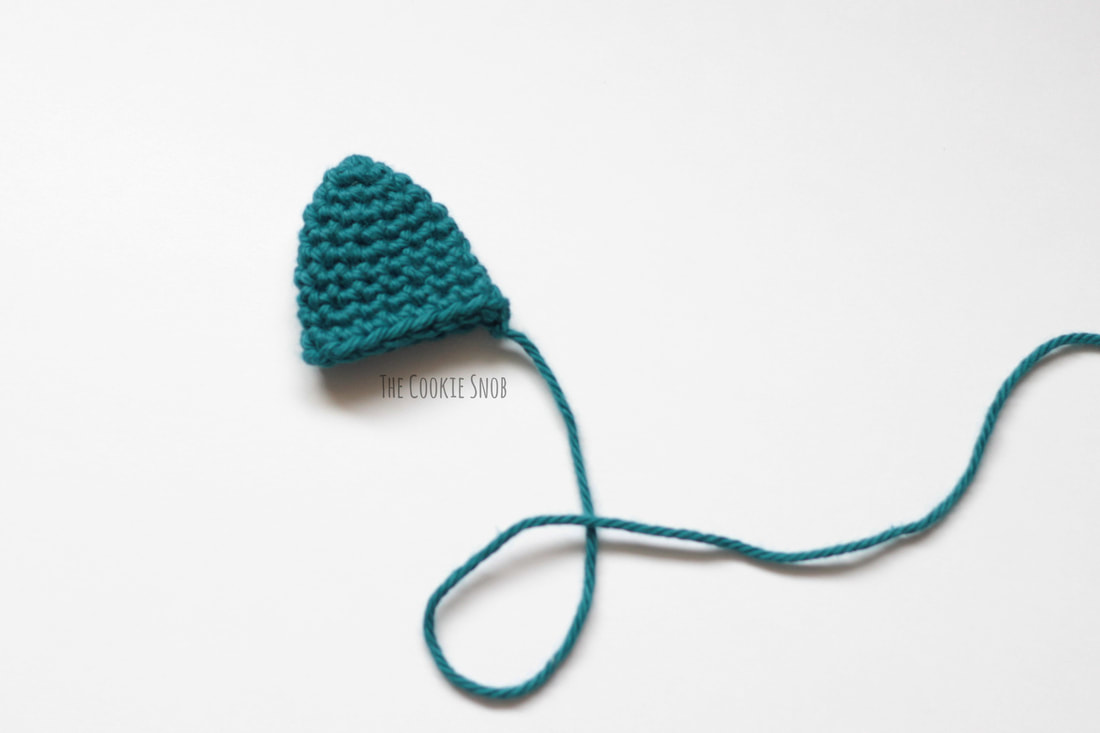
nUsing the Deep Teal yarn and the E hook:
nRound 1: Make a magic circle and work 6 sc into the circle (6)
nRound 2: sc around (6)
nRound 3: inc around (12)
nRounds 4-5: sc around (12)
nRound 6: [inc, sc in the next 5 sts] twice (14)
nRounds 7-8: sc around (14)
nRound 9: [inc, sc in the next 6 sts] twice (16)
nRound 10: sc around (16)
nSs to the next st to even off the round and fasten off, leaving a long yarn tail for sewing
n
n
n
n
n
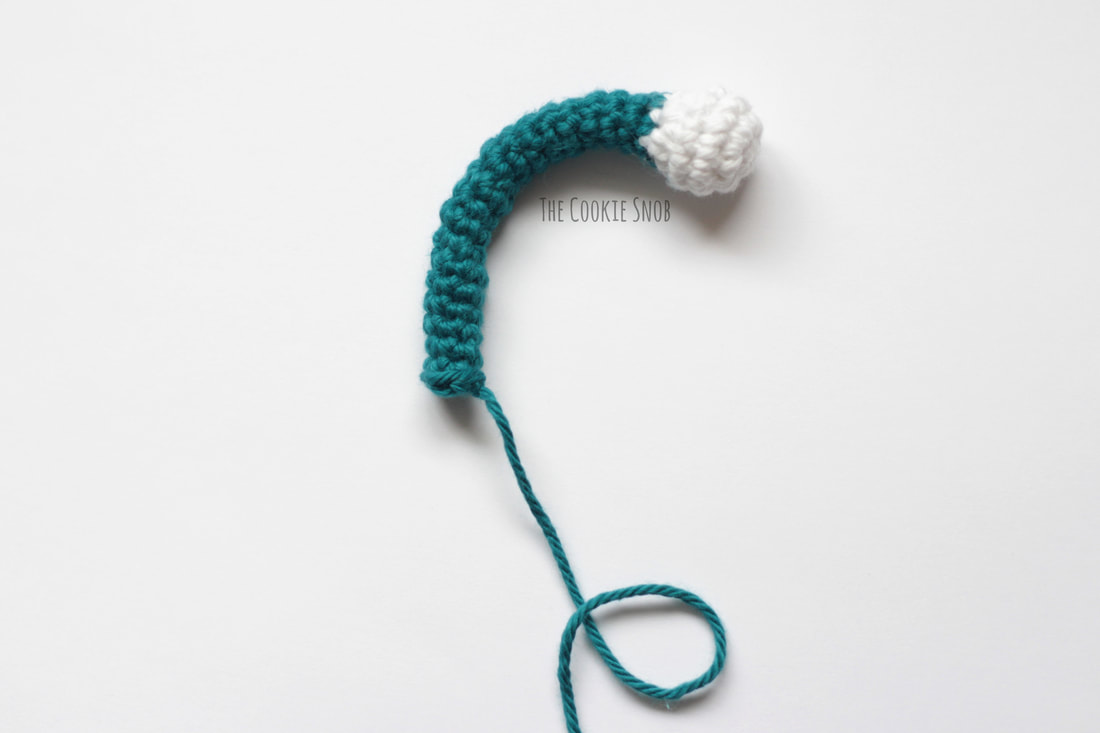
nStarting with the White yarn and the E hook:
nRound 1: Make a magic circle and work 6 sc into the circle (6)
nRound 2: inc around (12)
nRounds 3-4: sc around (12)
nLightly stuff with fiberfill
nRound 5: dec around (6)
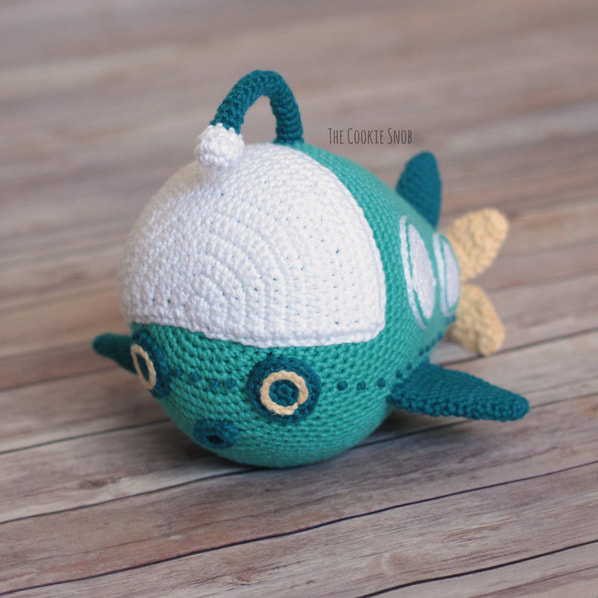
nFinish lightly stuffing; stuffing the rest of the antenna is optional (I didn’t stuff the stalk of the antenna on mine).
nSwitch to the Deep Teal yarn and the C hook.
nRounds 6-9: sc around (6)
nRound 10: inc, sc, dec, sc, sc (6)
nRounds 11-14: sc around (6)
nRound 15: sc, sc, inc, sc, dec (6)
nRound 16: sc around (6)
nRounds 17-18: repeat rounds 15-16
nRound 19: sc, dec, sc, inc, sc (6)
nRounds 20-24: sc around (6)
nFasten off, leaving a long yarn tail for sewing
nIf you want it to hold it’s shape more firmly, you can insert a pipe cleaner into the stalk of the antenna and trim to fit, but I wanted to make sure mine was washable so I left mine empty.
n
n
n
n
n
nUsing the Aspyn yarn and the E hook:
nRound 1: Make a magic circle and work 6 sc into the circle (6)
nRound 2: inc around (12)
nRound 3: [inc, sc] 6 times (18)
nRound 4: [sc, inc, sc] 6 times (24)
nRound 5: [inc, sc in the next 3 sts] 6 times (30)
nRound 6: [sc in the next 2 sts, inc, sc in the next 2 sts] 6 times (36)
nRound 7: [inc, sc in the next 5 sts] 6 times (42)
nRound 8: [sc in the next 3 sts, inc, sc in the next 3 sts] 6 times (48)
nRound 9: [inc, sc in the next 7 sts] 6 times (54)
nRound 10: [sc in the next 4 sts, inc, sc in the next 4 sts] 6 times (60)
nRound 11: [inc, sc in the next 9 sts] 6 times (66)
nRound 12: sc around (66)
nRound 13: [sc in the next 5 sts, inc, sc in the next 5 sts] 6 times (72)
nRound 14: sc around (72)
nRound 15: [inc, sc in the next 11 sts] 6 times (78)
nRound 16: sc around (78)
nRound 17: [sc in the next 6 sts, inc, sc in the next 6 sts] 6 times (84)
nRound 18: sc around (84)
nRound 19: [inc, sc in the next 13 sts] 6 times (90)
nRounds 20-24: sc around (90)
nRound 25: [dec, sc in the next 13 sts] 6 times (84)
nRound 26-27: sc around (84)
nRound 28: [sc in the next 6 sts, dec, sc in the next 6 sts] 6 times (78)
nRounds 29-31: sc around (78)
nRound 32: [dec, sc in the next 11 sts] 6 times (72)
nRounds 33-35: sc around (72)
nRound 36: [sc in the next 5 sts, dec, sc in the next 5 sts] 6 times (66)
nRounds 37-38: sc around (66)
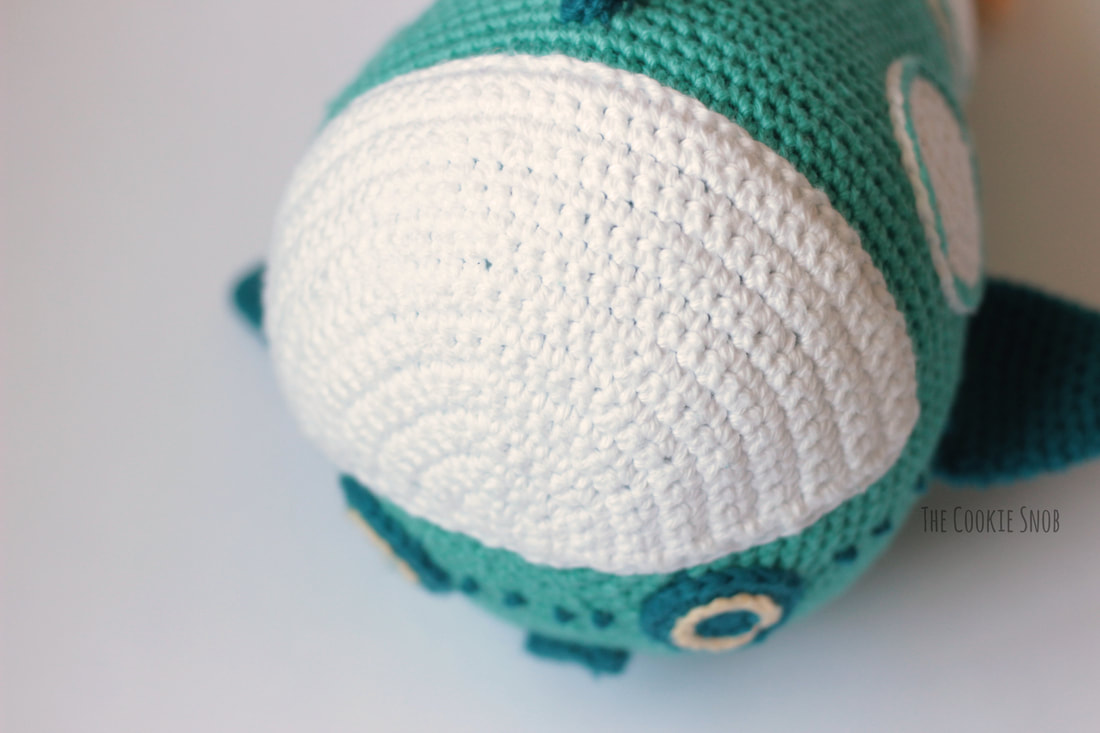
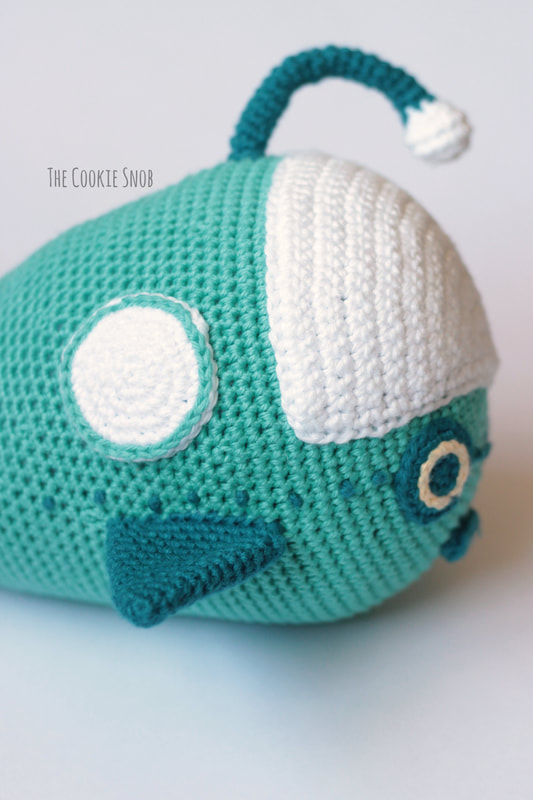
nI recommend that you pause crocheting at this point and begin attaching pieces to the body. If you really want to, you can wait until the very end to attack pieces, but I find it easier to attach pieces as I go.Using the long yarn tail, sew the windshield to the front; the stitches should line up exactly with the top half of the front. I find it easiest to first stitch the curved part of the windshield in between Rounds 20 and 21 and then to stitch the straight bottom of the windshield across the center of the front.Hint: When sewing it in place, I stitched through the front loops only of the windshield to help it lay flatter against the body of the GUP
n
n
n
n
n
n
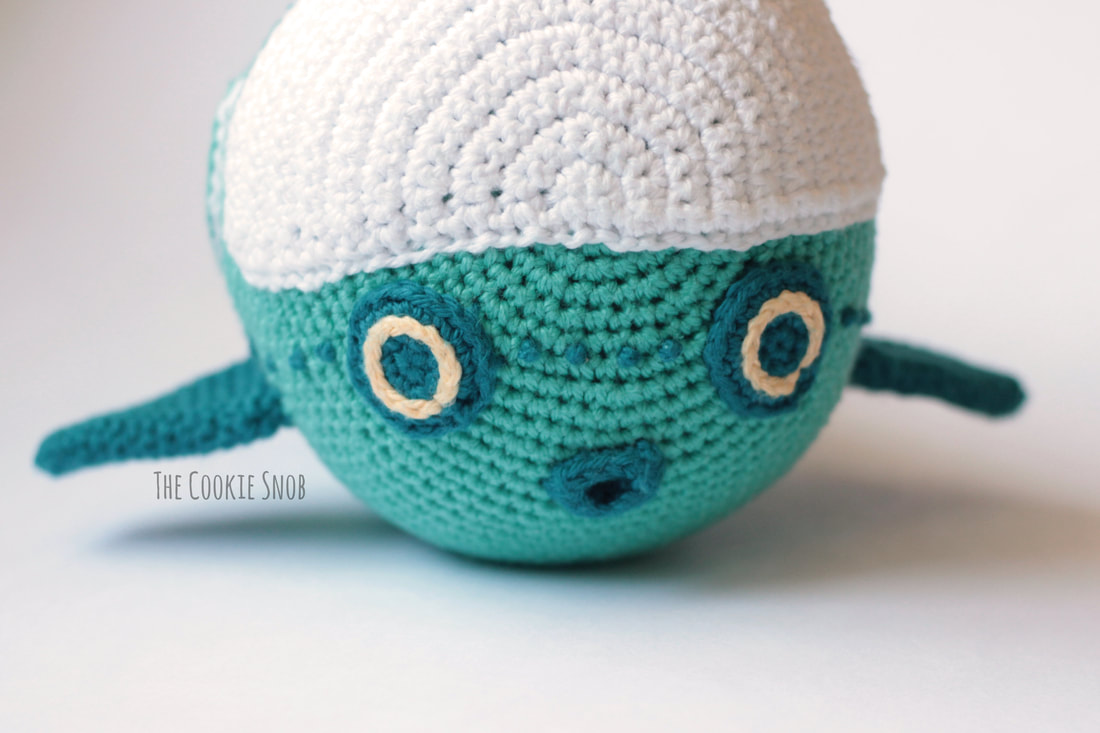
Using the yarn tails, sew the headlights below a couple of stitches below the windshield (placed between Rows 7 and 14 of the windshield)
n
For the “mouth” you can either use the Deep Teal yarn to surface crochet the shape, centered between the eyes and then work a sc into each st of the surface crochet, ss to join and fasten off. OR, if you prefer, you can ch 12, ss to join, and then ch 1 and sc in each st, ss to join and fasten off. Use the yarn tail to sew in place.
n
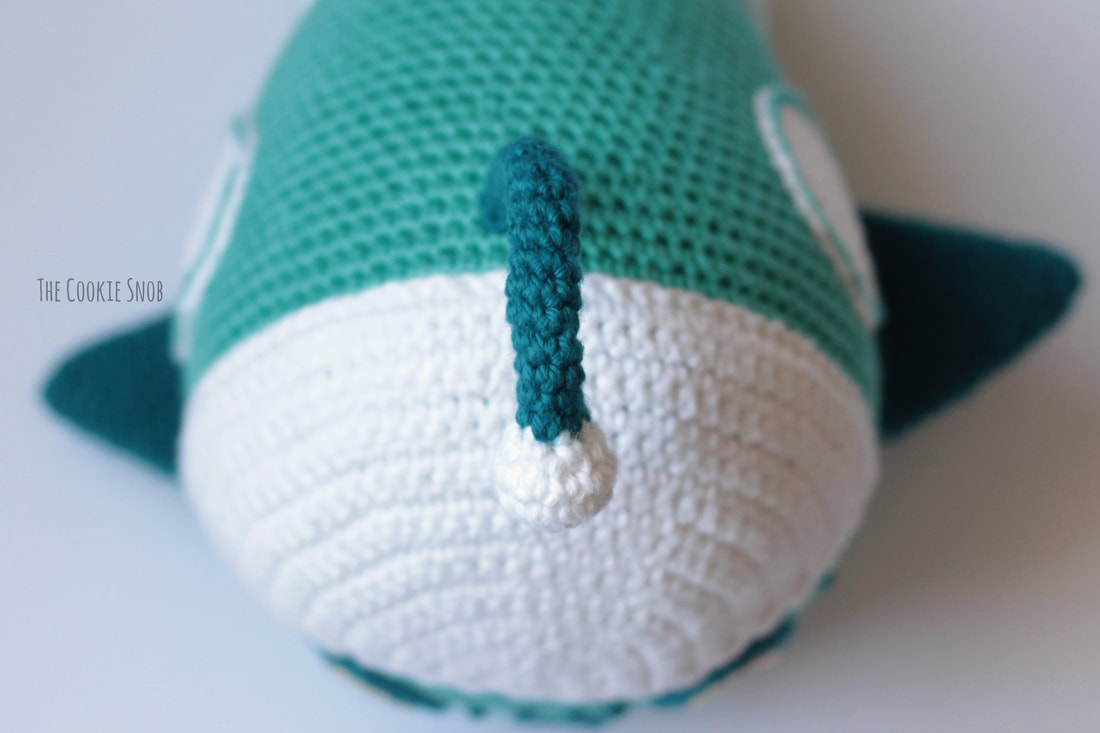
Using the tapestry needle and the Deep Teal yarn, stitch French knots in between the headlights, as shown. Continue to stitch French knots for the bolts along each side of the body in a straight line; continue to add them as you go when you continue crocheting the body.
n
n
n
n
n
n
n
n
n
n
n
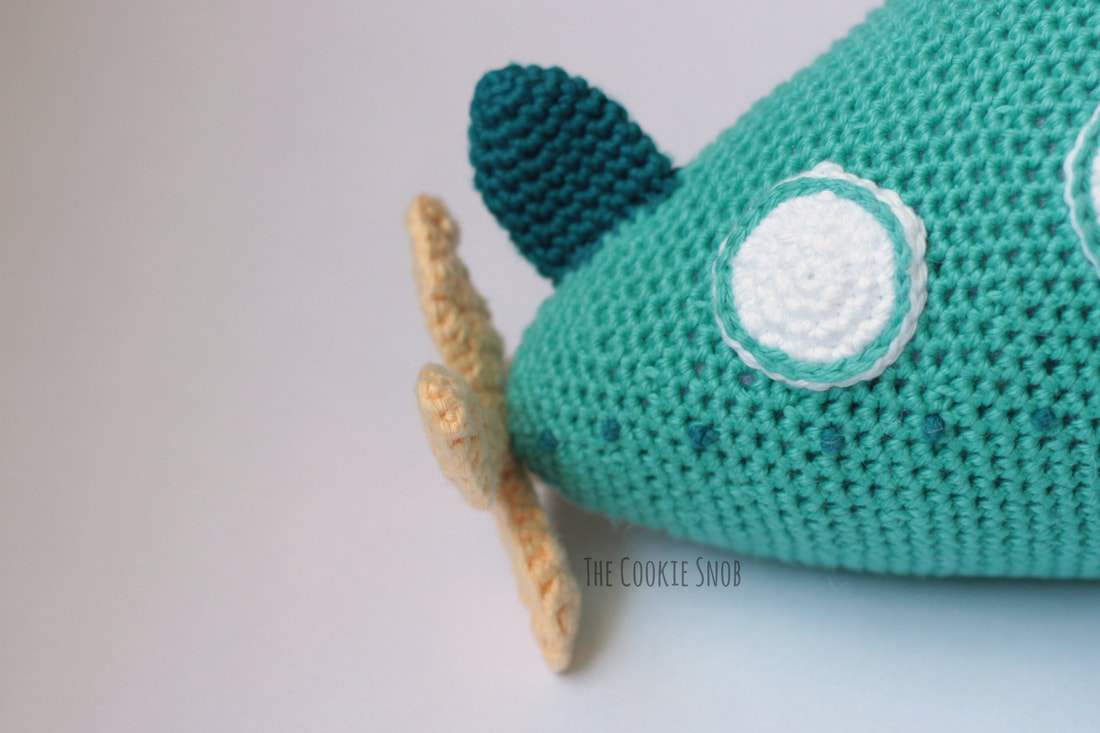
Flatten the side fins and then use the yarn tails to sew to each side of the body, parallel to the French knots and the bottom of the windshield. The edge of the front side of the fin should be about one round behind the edge of the windshield.
n
Using the Aspyn yarn and the E hook, surface crochet through the last round of the front window and the body to attach them together on each side. The front window should be placed about 4 rounds back from the curved edge of the windshield, with the bottom of the window lining up with the bottom of the windshield.
n
n
n
n
n
n
nRound 39: [dec, sc in the next 9 sts] 6 times (60)
nRounds 40-41: sc around (60)
nRound 42: [sc in the next 4 sts, dec, sc in the next 4 sts] 6 times (54)
nRounds 43-44: sc around (54)
nRound 45: [dec, sc in the next 7 sts] 6 times (48)
nRounds 46-47: sc around (48)
nRound 48: [sc in the next 3 sts, dec, sc in the next 3 sts] 6 times (42)
nRounds 49-50: sc around (42)
nRound 51: [dec, sc in the next 5 sts] 6 times (36)
nRounds 52-53: sc around (36)
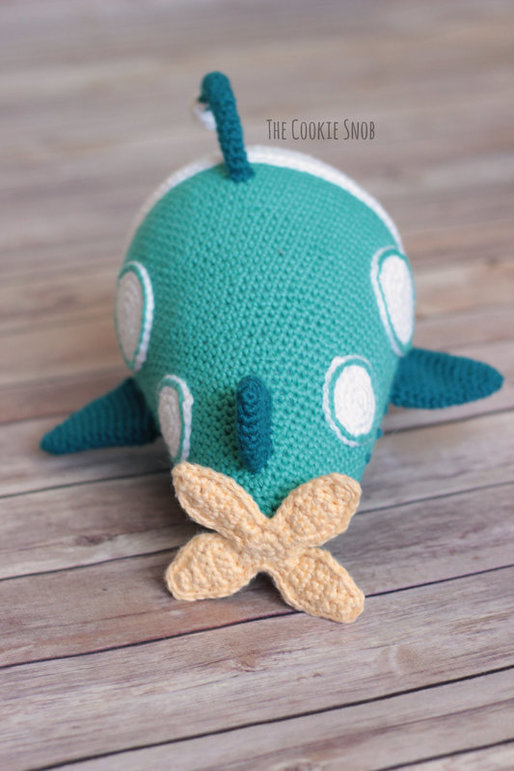
nI recommend pausing again to add the back windows. Attach with surface crochet, as with the front windows, about 7 rounds behind the front window.
n
n
n
n
n
nRounds 55-56: sc around (30)
nRound 57: [dec, sc in the next 3 sts] 6 times (24)
nRounds 58-59: sc around (24)
nRound 60: [sc, dec, sc] 6 times (18)
nRound 61: sc around (18)
nRound 62: [dec, sc] 6 times (12)
nFinish stuffing the body and make your final French knots. If you’re making a spinning propellor, attach the backing to the bottom of the safety eye post sticking out from the propellor. Then place the post and backing into the remaining hole. Work the last round around the post of the safety eye; the larger backing will keep it in place inside of the body once it’s done.
nRound 63: dec around (6)
nFasten off, leaving a long yarn tail. Using the tapestry needle, thread the tail through the remaining front loops of the last round and pull taut to close. Tie off and weave in ends.If you’re making a stationary propellor, stitch the center of the propellor to Round 63.Flatten the top fin. Using the yarn tail, sew the top fin in the top center of the body, behind the back windows. Weave in any remaining ends.
n
n
n
n
n
n
n
n
n
n
n
n